
I’m not dead. Honest!
It has, however, been a long time between posts. Unfortunately I haven’t been working on project work as much as I would have liked, and I spent a long time waiting for parts to arrive for projects.
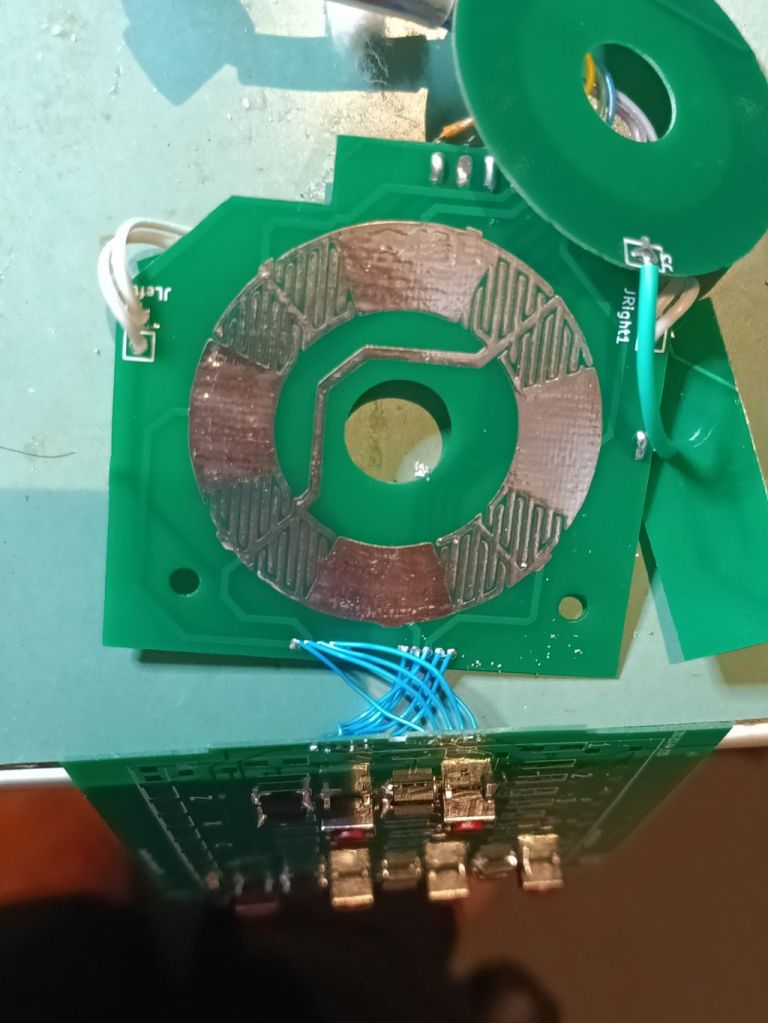
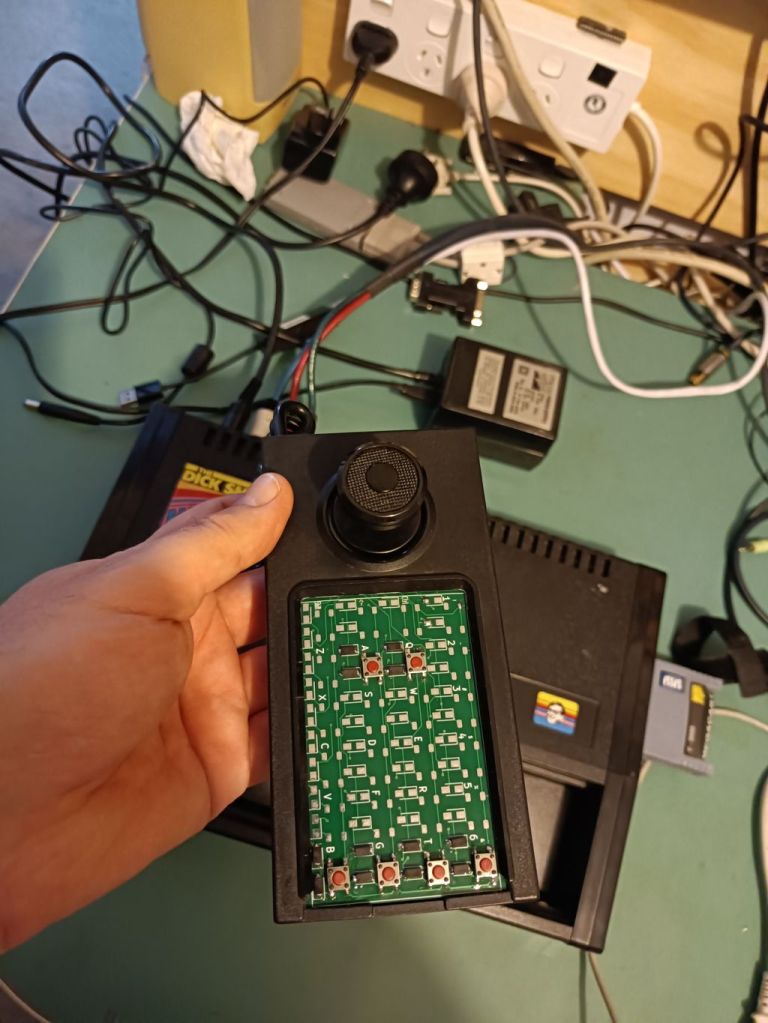
CreatiVision Controllers
(AKA the Dick Smith Wizzard)
The new PCBs arrived. It took me a few days to get to the shops to buy the appropriate SMD diodes I needed.
I then spent several minutes tacking in SMD components, followed by the slow realisation that my “clever” idea to use finer spaced soldering holes so I could use ribbon cables wasn’t as “clever” as I’d hoped. Eventually I managed to get everything wired up, tested and… It didn’t work.
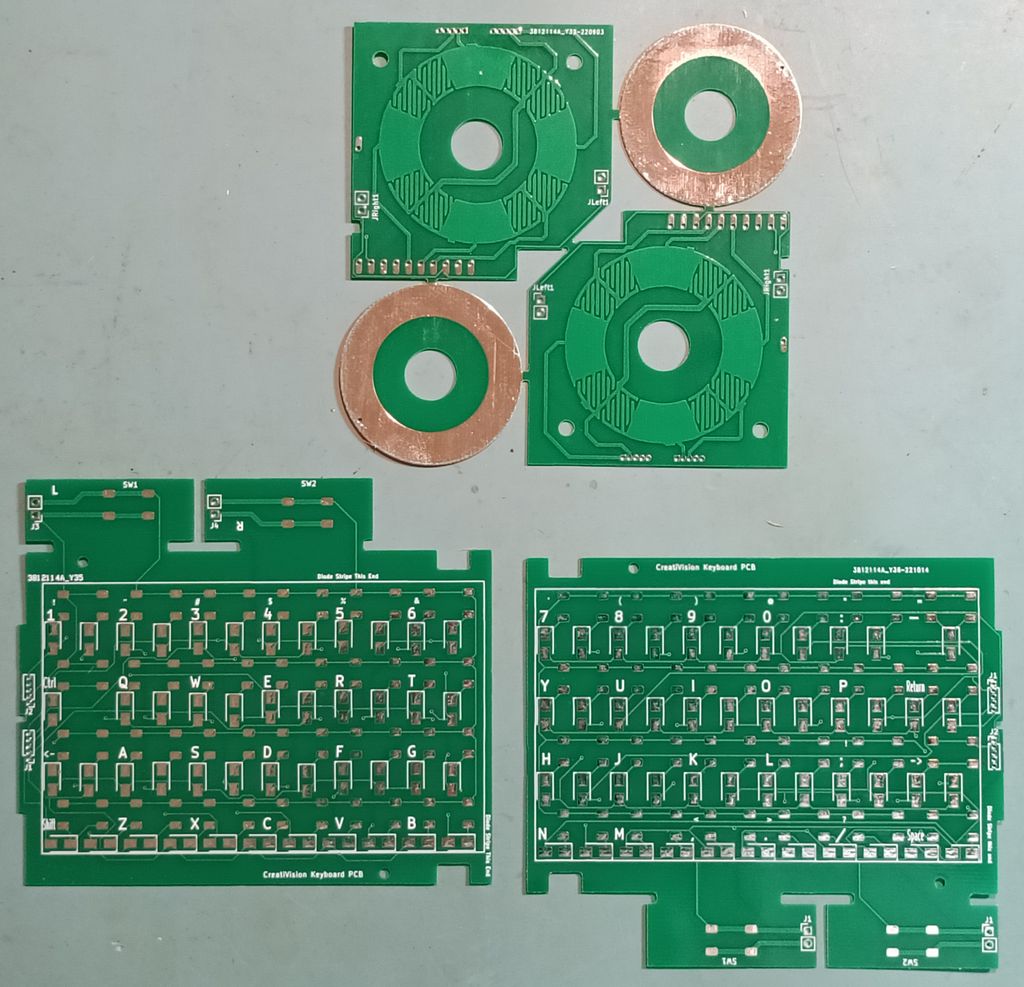
This was not what I was expecting. This was a revision of a working design. I stopped and put it aside for a week or so before approaching it again. Looking over the PCB I could see issues with connectors being in the wrong place. It looked like I had accidently switched the two connectors. Easy peasy.
Patched again and… It still didn’t work.
I went back to the PCB printout and started sanity checking… every. single. connection.
After an hour or so of checking I finally twigged. The two connectors were in the right place, just rotated 180°, which really didn’t help 🙂
I patched it again, and this time it actually all worked! I’ve moved the fixes back to the main board and I just need to submit it for PCB fabrication.
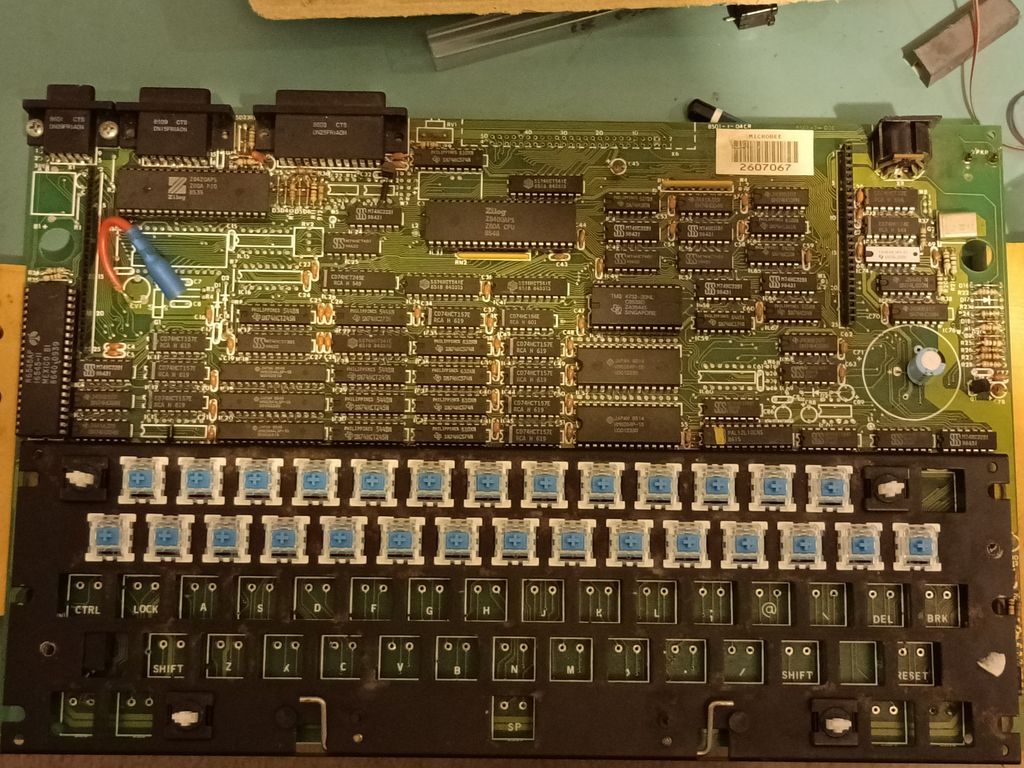
Microbee Keyboard
This one, well let’s just say I ended up taking a completely different path to the path I planned.
Originally I had been given an “interposer” board (Thanks Brad!) but after several attempts I couldn’t get it to work reliably. To this day, I’m not sure what is wrong with it. I assume I did something wrong, but after the third time I had to desolder all 63 keys to make a correction, I gave up on that path. I’d never managed to get a single key to register, despite checking everything, and finding no obvious issues.
I’d wasted too much of Brad’s time, and too much of my own. Time to think laterally…
I knew the main PCB was working as if I shorted out the connection holes with a pair of tweezers carefully, keypresses would register. The next step, obviously, was to get the mechanical keys I had (knockoffs of Cherry MX blues) and get them talking to the PCB.
There were several barriers
- While the Cherry MX knockoffs (Henceforth referred to as the MX keys) fitted perfectly into the keyboard frame, they didn’t extend below the frame as far as the original keys (Henceforth referred to as the OG keys) which left about a 5mm gap
- The MX keys and the OG keys also had a different footprint. The holes on the OG keys were evenly aligned and spaced towards the top of the frame. The holes on MX were offset from each other vertically, and tended towards the right of the frame.
- The keystems on the MX keys is a lot narrower than those on the OG keys.
I realised 1 and 2 could be solved with the same solution. 3 was always going to be a problem, and I’d already designed a 3d adapter that would hopefully solve this.
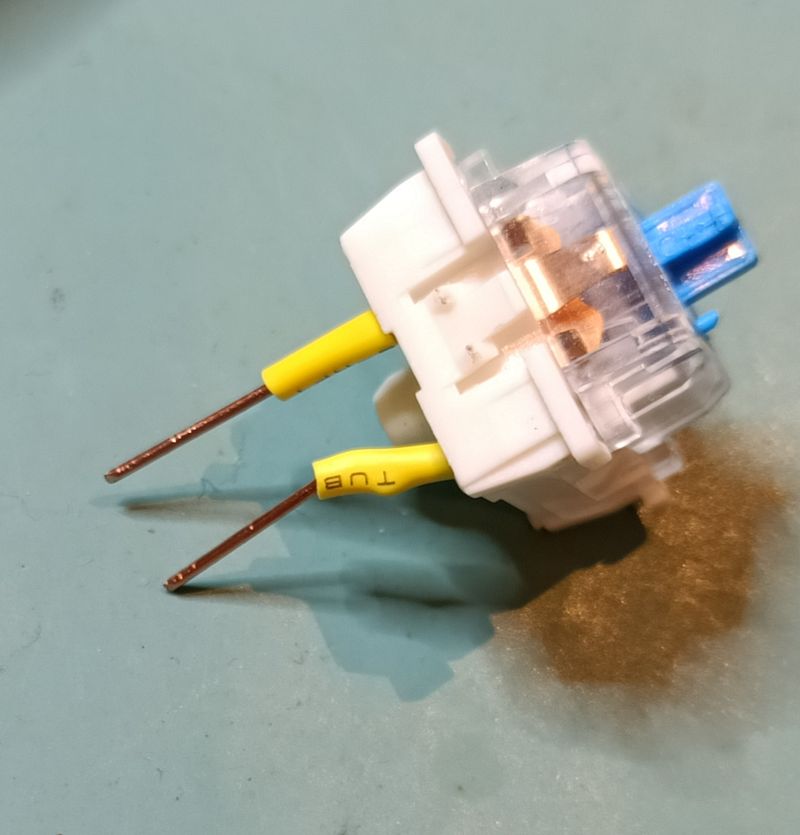
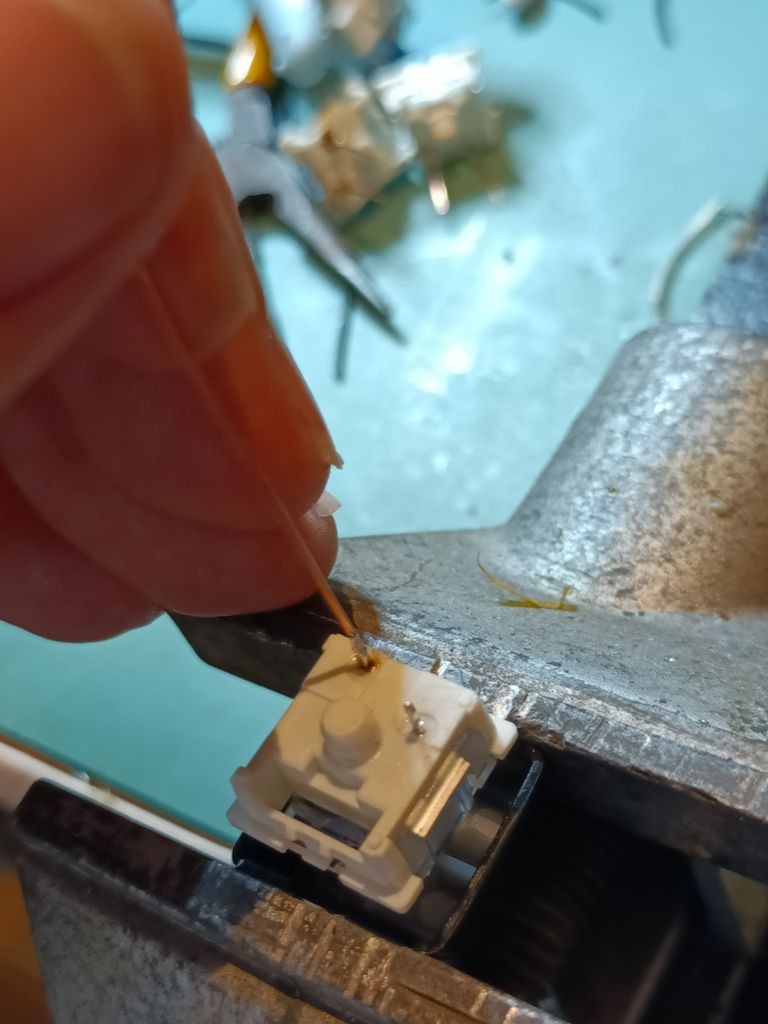
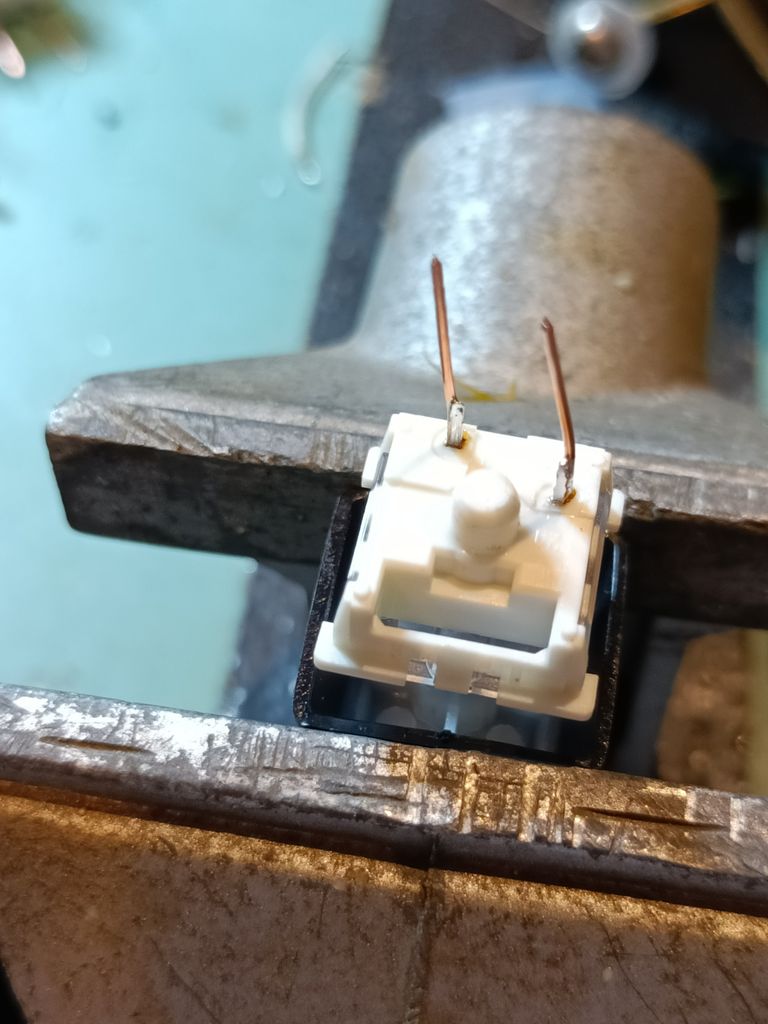
So how do we solve the problem 1 and 2? We extend the legs of the MX keys and bend them to match the OG footprint!
Further thinking and I’d refined it even further. Use solid core wire, as it will keep the bend. wrap the solder joint between the key contact and the wire to provide both electrical insulation as well as to minimise the chance of things “coming apart” as I solder in the switch.
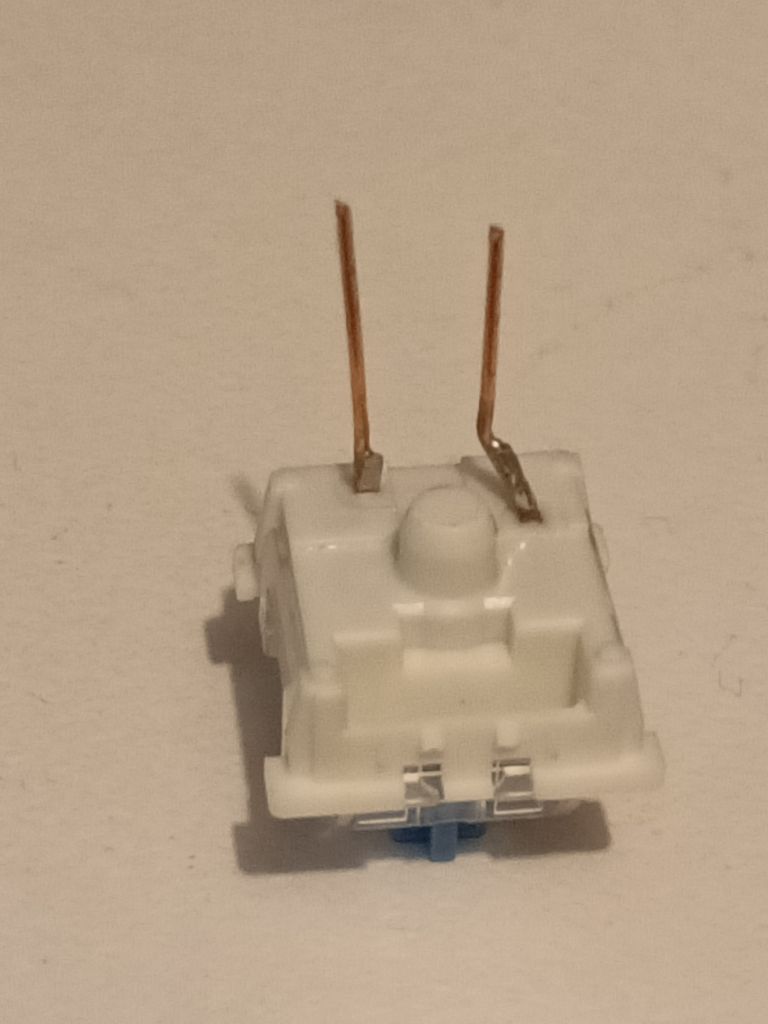
A bit of tweaking and a few attempts and I had this:
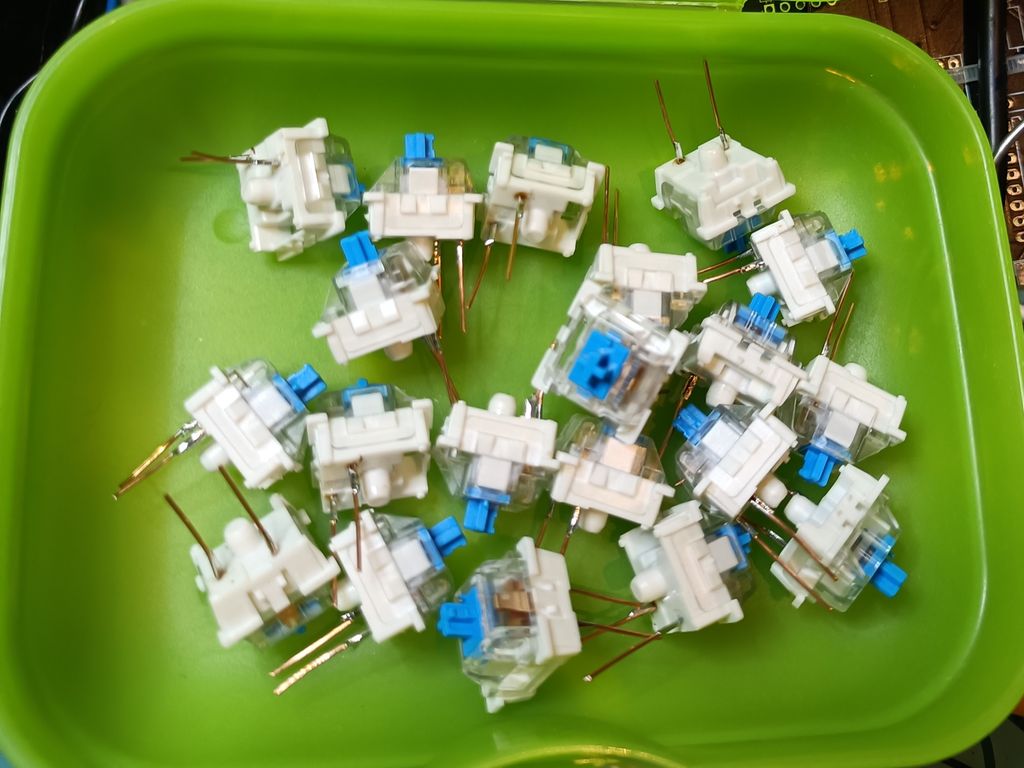
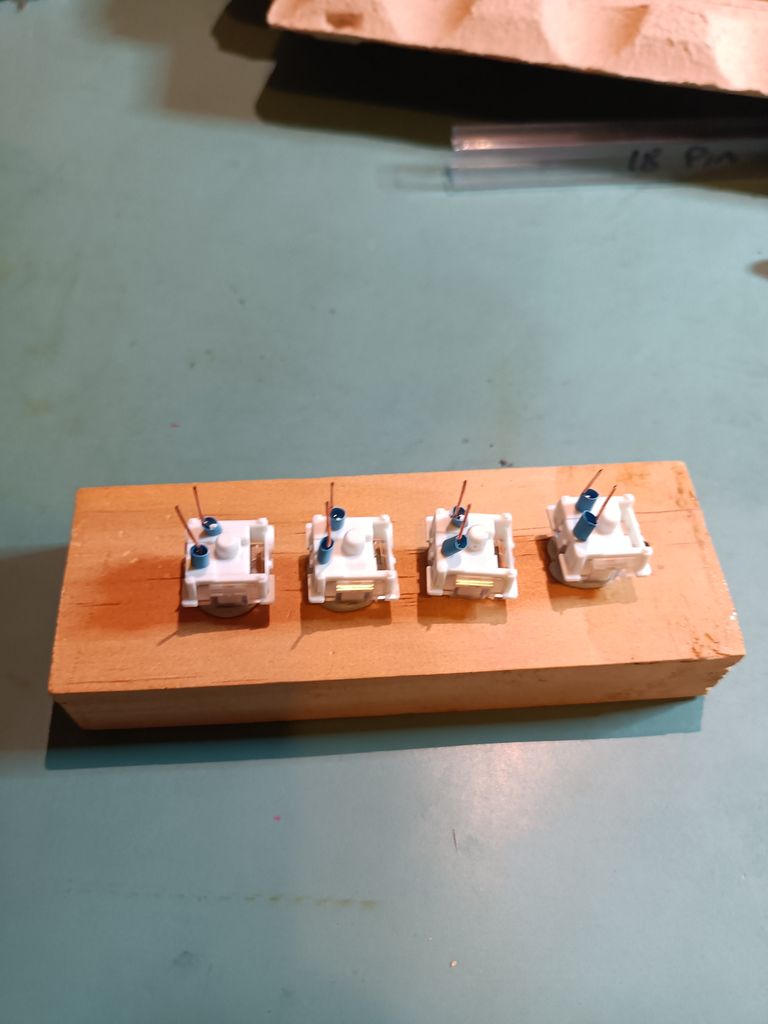
Now repeat another 63 times! (I wanted one spare).
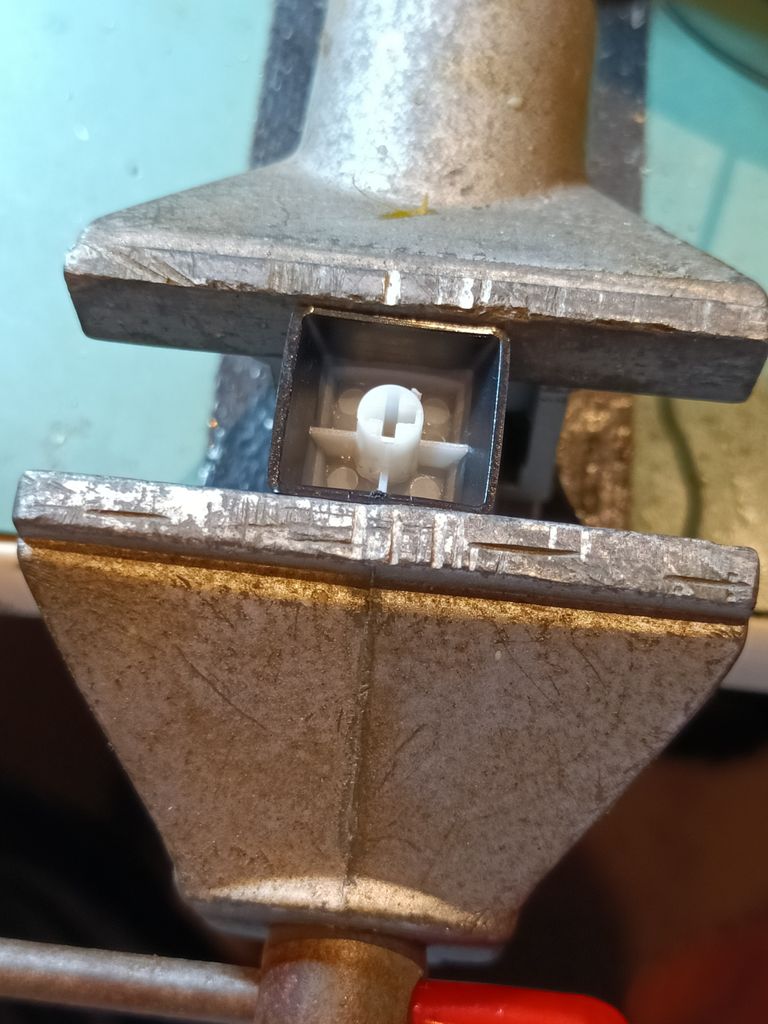
I ended up making two different jigs to simplify things. The first was a suitable keycap off an MX compatible keyboard, inverted and held in a clamp. This allowed me to hold the keys very precisely and aided in soldering in the wire extension legs with minimum swearing. I also used plenty of flux, and tinned both parts of the joint. It went much more smoothly than I expected.
The second was a “bit o wood, holes drilled and a blob of blu tack around each hole”. This allowed me to heatshrink several keys at a time when I reached the heatshrinking stage.
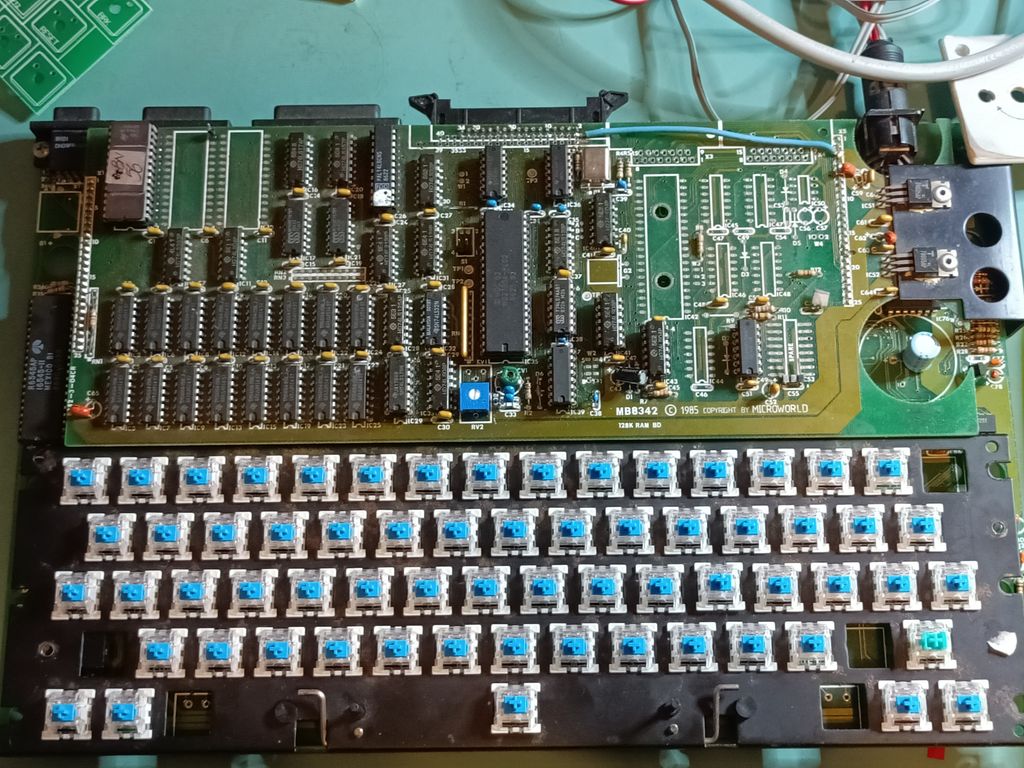
Now my keycaps were ready, and all carefully bent and tested to make sure I had a good fit, the next challenge was to make sure the keyboard frame was held at the right height. If this step failed (And it had failed several times when I was using the interposer PCB) then the case wouldn’t fit properly.
Thankfully I had a “clever” idea, and simply soldered back in four of the OG switches on the four corners of the keyboard. (Conveniently there were even 2 “unused” spots next to the arrow keys, which helped secure the lower half of the keyboard without blocking any “in use” key spots.)
Once those four were in (only soldered by one leg each) I was able to quickly solder in all the rest of the keys in a short time. Once the new keys were in, I desoldered the four OG keys and soldered in the remaining two keys. Everything looked good, but the test was always whether it actually worked or not.
Apprehensively I turned on the system, with my Gotek connected with a virtual disk of Adventure games slotted in.
It asked me to hit a letter to choose a game. I pressed the “a” key, and as hoped, Zork loaded! Even better yet, I was able to then type “open letterbox” followed by “the quick brown fox jumps over the lazy dog”. It worked! All the keys worked!
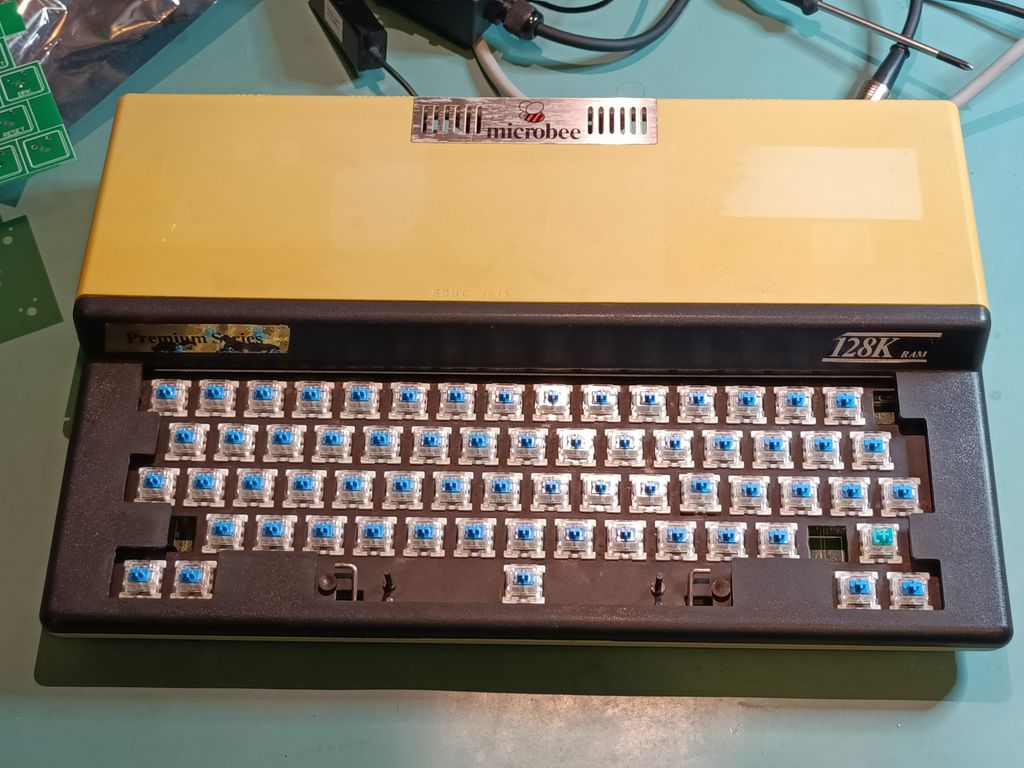
I was overjoyed!
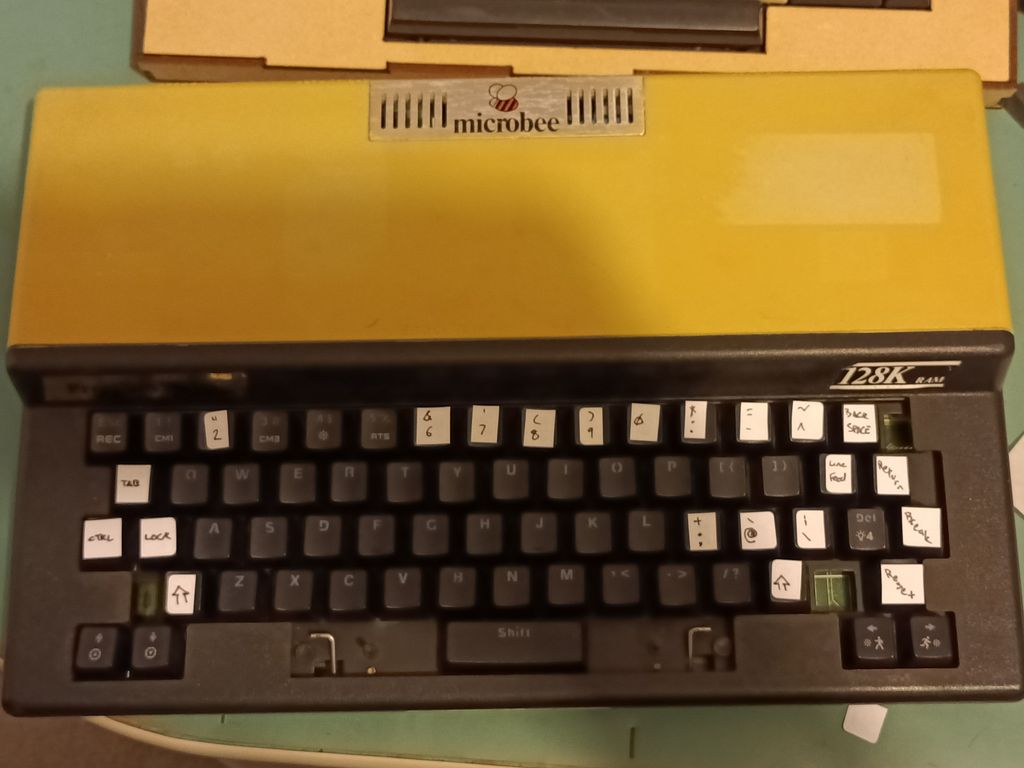
I still need to print out the stem adapters so I can use the original keys. For now I have “borrowed” keys from a mechanical keyboard and stuck them on as a “temporary” solution.
TRS / 80 Color Computer Disk Drive
The CoCos have been pretty reliable. It took me a few goes to be able to reliably load software off “tape” to it. (I had made up my own adapter to go from the Tape input to a 3½mm jack so I could use an old mobile phone as a “tape drive”.)
Someone on the CoCo discord suggested I look at DriveWire, which turns out to be a clever piece of software that uses your computer as a “virtual” disk drive with the CoCo. The cable was easy to make, and I had “real” serial ports on my PC to make everything easier.
Linux has made things a smidge more complicated but I’ve worked around most of the issues
So far I have played a handful of games. The only painful part is that I have to load the DriveWire software each time I want to play a game, and that takes nearly a minute each time. Not unbearable (hey, I grew up using a Commodore 64 after all) but not exactly “snappy”.
I plan to get DriveWire on a ROM eventually, as well as I have a CoCoSDC on order.
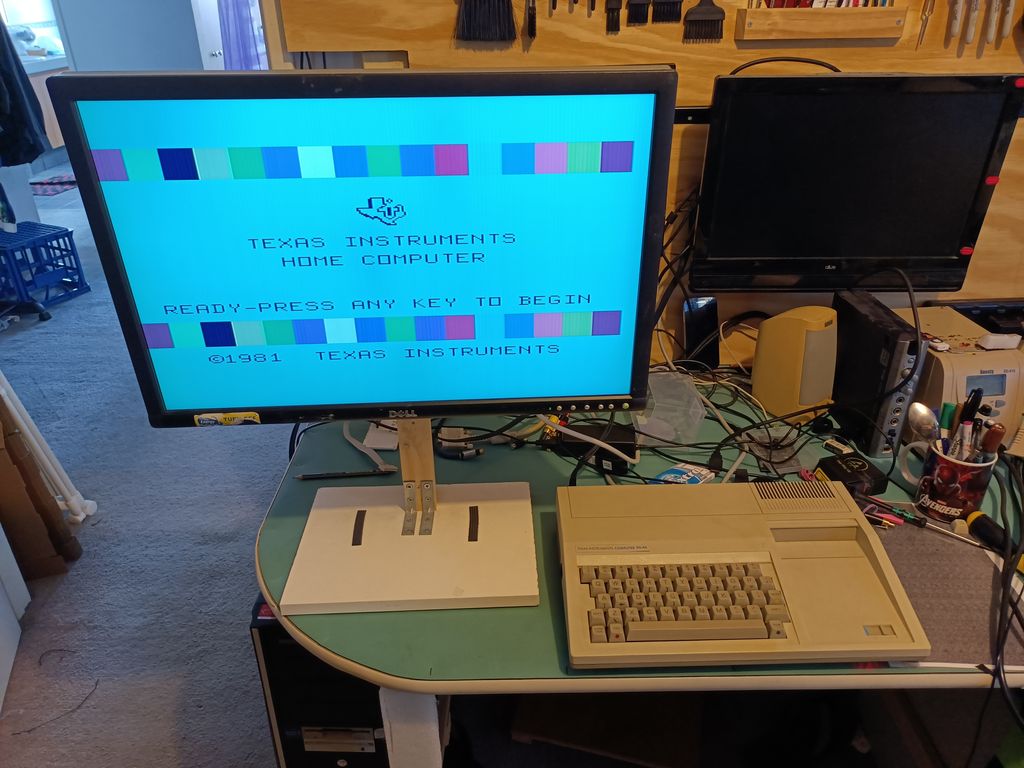
TI 99/4a Power Supply
I finally got all the components to make up the power supply boards. These are drop in replacements for the existing internal power board. This ended up being a very easy project with only a handful of components. 12 in total including the power connector. I was able to source everything new except the power switch which I salvaged off the original motherboard.
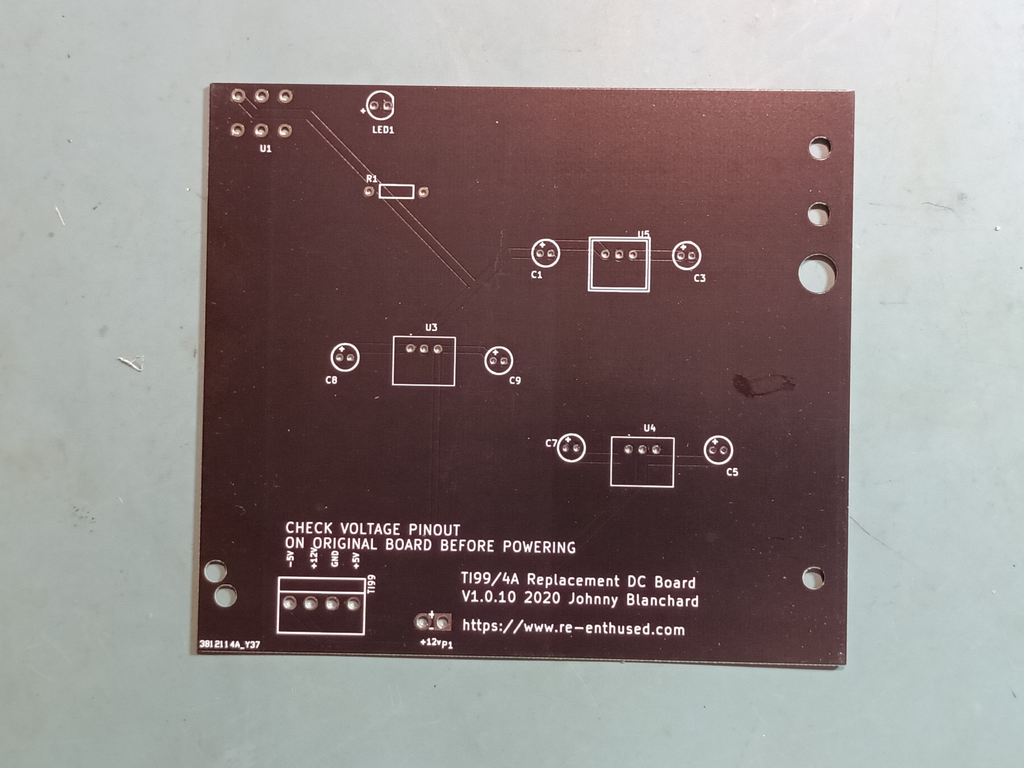
I very gingerly and carefully tested at every step. No shorts to ground. OK, power up the board without plugging it in and check voltages are all OK.
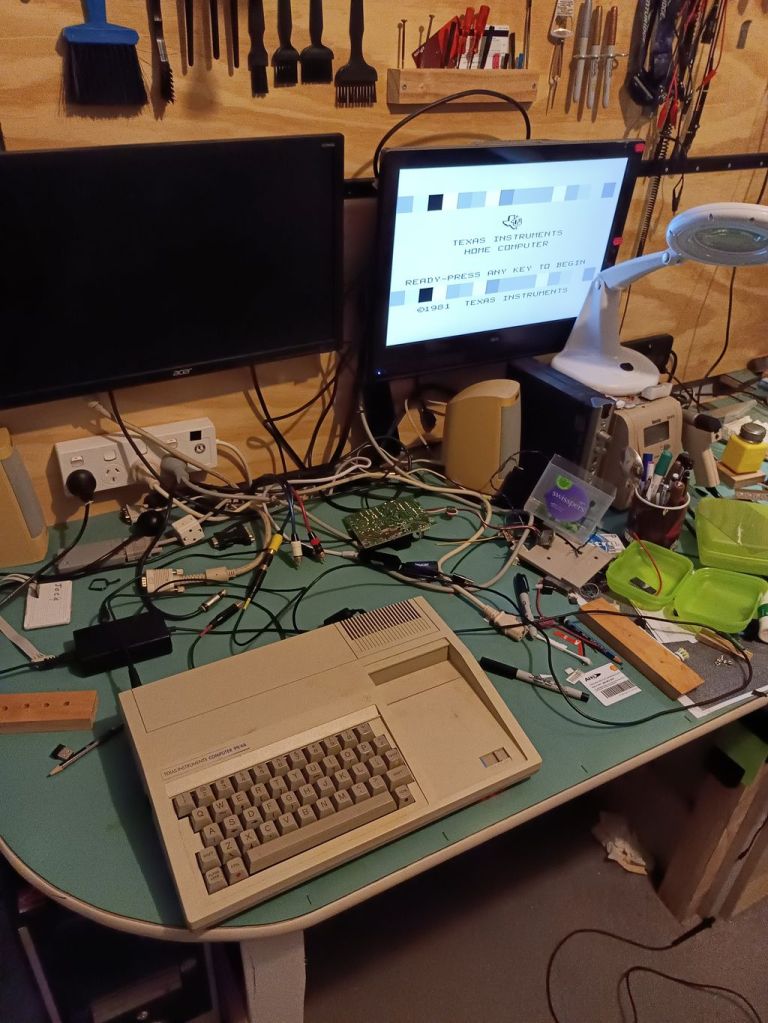
Once I couldn’t find anything else to test I reassembled the TI 99/4a and plugged it in and it worked first go! I was pretty happy, to be honest.
Next up I copied the silhouette of the original power supply socket onto some tin and carefully used my nibbler to cut around the edges to get an nice neat piece to fill the hole where the original sat. It looked really nice, so I carefully drilled a hole for the new PSU connector to come out. Stepping up slowly in drill sizes, I was up to the second last drill bit, when it “bit into” the metal, wrenched it from the pliers I was using to hold it, and promptly munched a great big jagged hole.
There was much swearing.
Version 2 used a piece of an old “rewards” card of some time. Soft enough for me to be able to work easily. Hard enough that

After a while I noticed some flakiness that I eventually determined was the salvaged switch so a quick disassemble and clean with an ink eraser, and it’s been rock solid since.
I wanted to try one more thing.
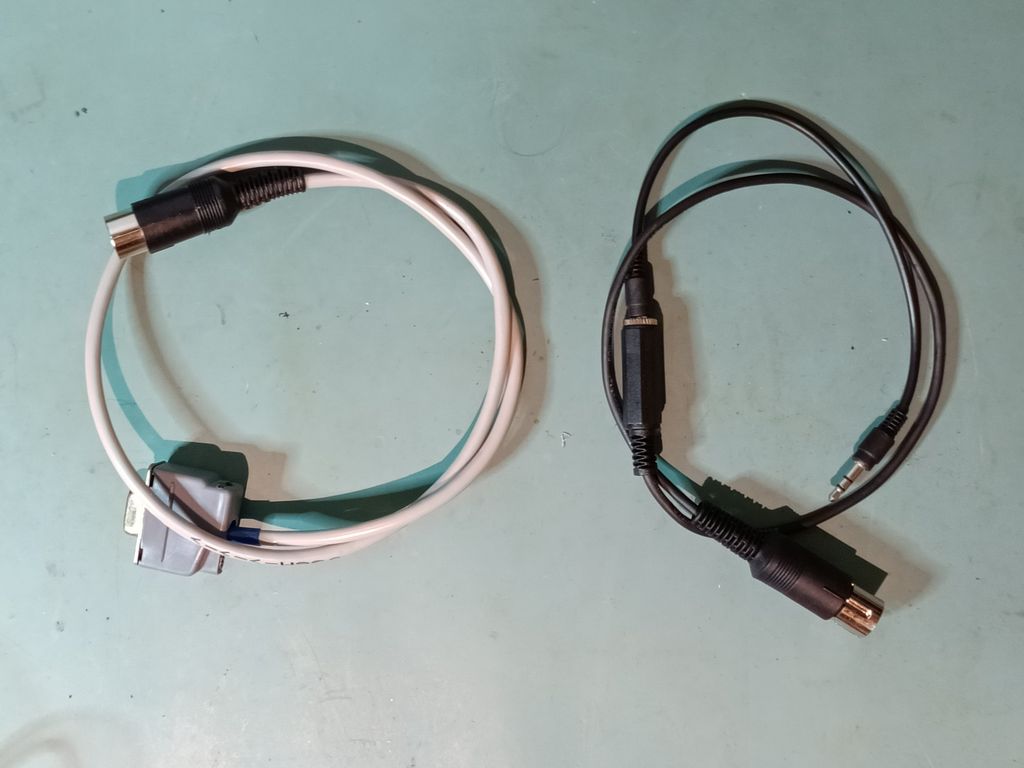
See, as this was a PAL model TI 99/4a, there was no colour directly out of the video port. There were two options: Mod the TI 99/4a to extract RGB colour via a sub board (A mod I may do one day, and I might even test on a CreatiVision) or try and find a monitor that was compatible with the slightly wonky Composite (YPbPr) signal on the video port.
Since I had lots of monitors, I took a punt and made up the appropriate video cable. Worst case, it would still work as a composite signal.

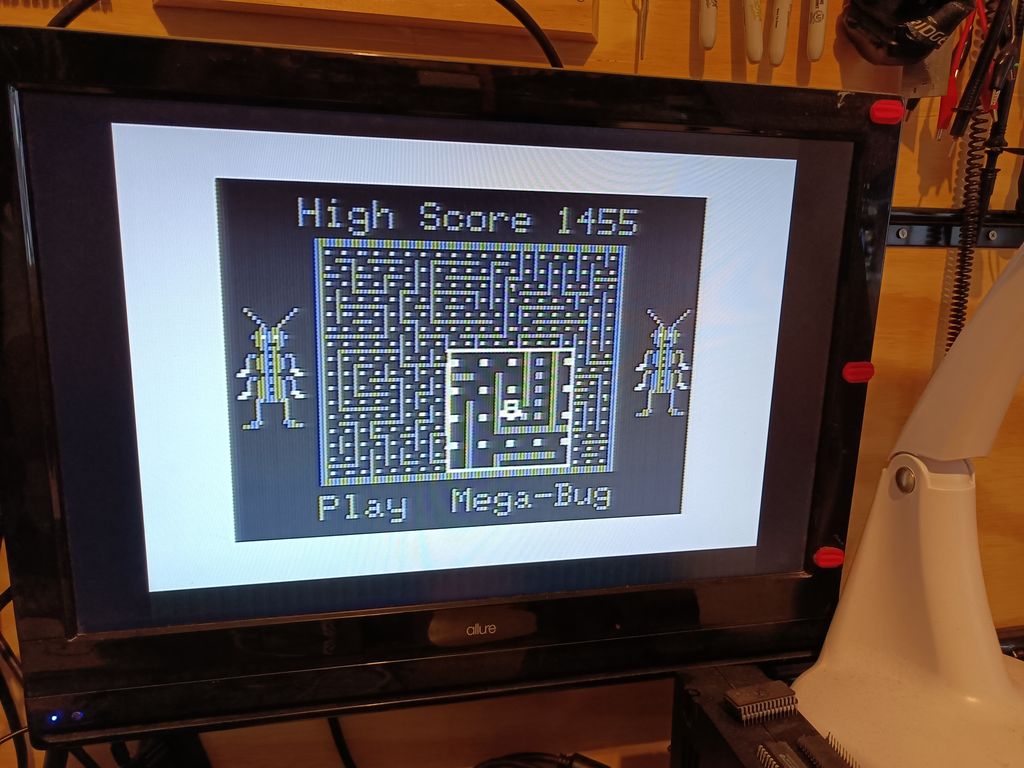
Plugging it into my first TV, I got a brief picture followed by “Invalid Format” on the screen. Same on my second TV. On a whim I tried it with one of my old massive Dell monitors and, to my surprise, I got a rock solid colour image! It does mean I have to use the TI exclusively with that monitor, but I can live with that.
One final addendum. I finally got up the nerve to test the second TI 99/4. It works fine 😀
It’s off to a new home shortly…
